
Methodology #
This tutorial maybe are not user friendly enough instruction, the author expect who find this tutorial have been touching linux in life.
Prerequisites #
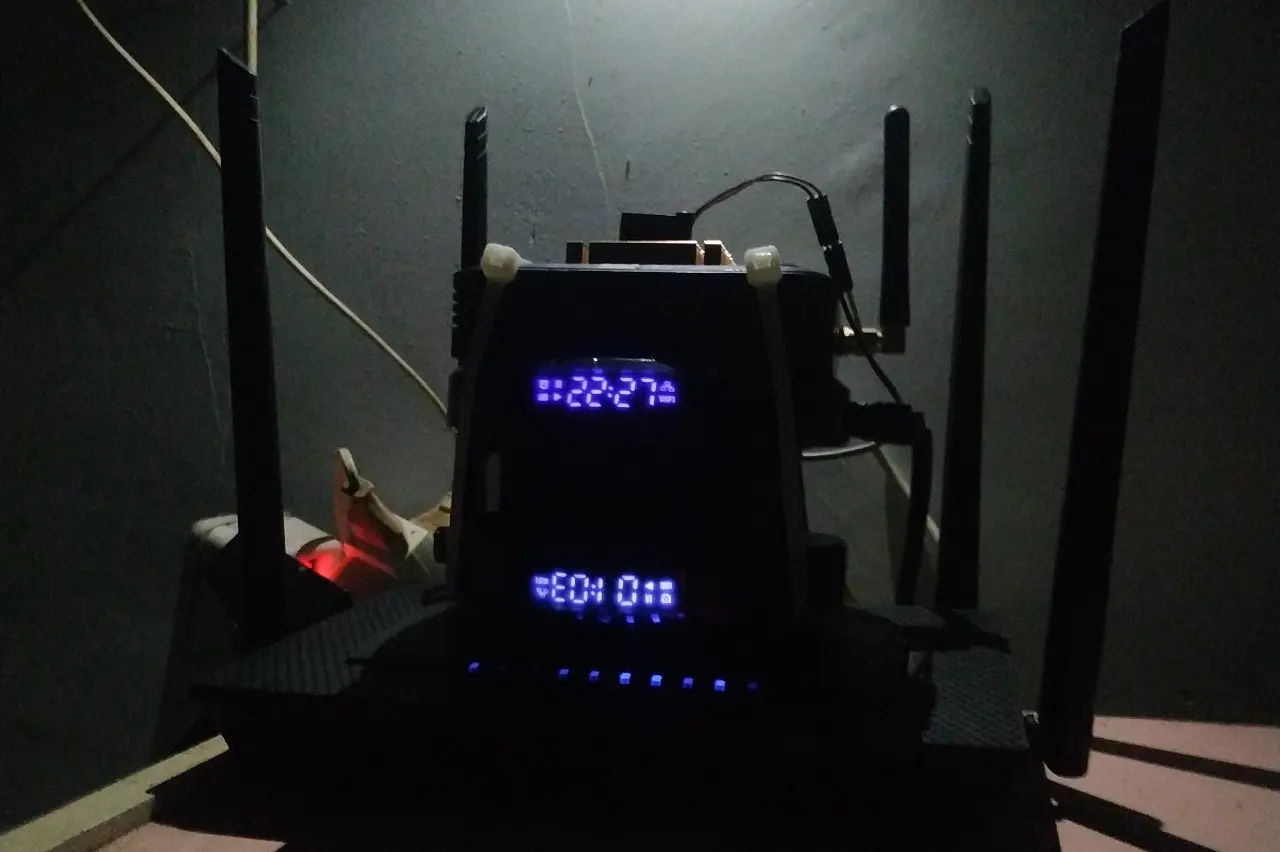
Hardware #
- 1x Tanix TX6 3GB
- 2x H96 Max X3 4GB
- 1x Gigabit Router
Pre-setup #
Setup the devices
Looking for setup-ing STB? I’m not gonna explain in here, because there is so many variant out there, and each variant own each “howto” methods itself.Find the IP address
My case is192.168.1.[2,3,4](Three node), you can find these by looking on your router or switch or any methods on the internet.Asign the hostname
Next step you need to login into each one, then asign hostname into each other because slurm will gonna use it later. You can modified on/etc/hostnameand/etc/hosts.Time synchronization
Make sure timedate are synchronize on whole node, because this will use for communication to each devices. You can use NTP service, my case I use systemd-timesyncd.service.
root@s0:~# systemctl status systemd-timesyncd.service
○ systemd-timesyncd.service - Network Time Synchronization
     Loaded: loaded (/lib/systemd/system/systemd-timesyncd.service; enabled; preset: enabled)
     Active: inactive (dead) since Fri 2026-01-16 04:46:11 WIB; 9h ago
   Duration: 46.260s
       Docs: man:systemd-timesyncd.service(8)
    Process: 480 ExecStart=/lib/systemd/systemd-timesyncd (code=exited, status=0/SUCCESS)
   Main PID: 480 (code=exited, status=0/SUCCESS)
     Status: "Idle."
CPU: 245msShared Storage #
There is so many alternates to solve this issue, but right know I will performed using NFS.
root@wb:~# lsblk
NAME        MAJ:MIN RM  SIZE RO TYPE MOUNTPOINTS
sda 8:0 1 14.9G 0 diskThis usb will used for NFS storage.
NOTE: This is on another server and are not part of three node, I separate this because I like a clean system.
Warning: Performing guide below will erase your data, always backup first!
wipefs will remove whole partition on your disk.
wipefs -af /dev/sdafdisk suppose to create new partition on your disk.
fdisk /dev/sdamkfs.ext4 formating partition into ext4 filesystem.
root@wb:~# mkfs.ext4 /dev/sda1
mke2fs 1.47.0 (5-Feb-2023)
Creating filesystem with 3915264 4k blocks and 979200 inodes
Filesystem UUID: ba2bdffd-dcd9-4874-921e-34afc69ce281
Superblock backups stored on blocks:
	32768, 98304, 163840, 229376, 294912, 819200, 884736, 1605632, 2654208

Allocating group tables: done
Writing inode tables: done
Creating journal (16384 blocks): done
Writing superblocks and filesystem accounting information: doneMounting /dev/sda1 partition into /mnt/nfs.
root@wb:~# mount /dev/sda1 /mnt/nfs -m
mount: (hint) your fstab has been modified, but systemd still uses
       the old version; use 'systemctl daemon-reload' to reload.
root@wb:~# systemctl daemon-reload
root@wb:~# NAME   MAJ:MIN RM  SIZE RO TYPE MOUNTPOINTS
sda      8:0    1 14.9G  0 disk
└─sda1 8:1 1 14.9G 0 part /mnt/nfsThen give all permission to mounted /mnt/nfs directory.
root@wb:~# chown nobody:nogroup -R /mnt/nfs
root@wb:~# chmod 777 -R /mnt/nfsYou need UUID and you can obtain UUID by using blkid. Then put on fstab.
root@wb:~# blkid /dev/sda1
/dev/sda1: UUID="ba2bdffd-dcd9-4874-921e-34afc69ce281" BLOCK_SIZE="4096" TYPE="ext4" PARTUUID="8eaa0a3b-01"Make partition auto-mounted and persistent by modifying /etc/fstab like below.
This is my fstab in this case, and just put in on end of line.
UUID=ba2bdffd-dcd9-4874-921e-34afc69ce281 /mnt/nfs ext4 defaults 0 2Configure NFS Server #
NOTE: this NFS server are not part of my 3 nodes, it just file sharing over NFS.
You need to install first, my case I’m in Debian distro.
root@wb:~# apt install nfs-kernel-server -y
Reading package lists... Done
Building dependency tree... Done
Reading state information... Done
nfs-kernel-server is already the newest version (1:2.6.2-4+deb12u1).
0 upgraded, 0 newly installed, 0 to remove and 23 not upgraded.Then configure NFS config on /etc/exports like this.
NOTE: IP address depend on case, IP mean it allow whole subnet address to access into this file sharing. My three STB connect into a router that route into 192.168.0.0/24, so in my case am not using 192.168.1.0/24 of my router switch. Instead use my NFS subnet address family 192.168.0.0/24.
/mnt/nfs 192.168.0.0/24(rw,sync,no_root_squash,no_subtree_check)Then save it, and run this command on terminal to activate NFS configuration.
exportfs -aConfigure NFS Client #
NOTE: In this part we will configure our whole nodes to mount NFS that we create before.
This is list of my STB nodes:
192.168.1.4 	s2
192.168.1.3 	s1
192.168.1.2 s0First we need to install packages NFS client, right now you need to perform this on whole nodes. Its depend on you will gonna use something like ansible, puppet, or else for automate. But I will using ssh instead.
ssh root@s0
ssh root@s1
ssh root@s2apt install nfs-commonCreate /nfs mount point and give it all full permission.
mkdir /nfs
chown nobody:nogroup /nfs
chmod -R 777 /nfsConfigure /etc/fstab on client, like this. Again the IP is depend on case,
below is my NFS server with mount point 192.168.0.2:/mnt/nfs, the next after is your /nfs address on your client, its where whole node will acess NFS storage.
echo "192.168.0.2:/mnt/nfs /nfs nfs defaults 0 0" | tee -a /etc/fstabAfter all, you need to mount it using this command.
root@s0:~# mount -a
mount: (hint) your fstab has been modified, but systemd still uses
       the old version; use 'systemctl daemon-reload' to reload
root@s0:~# systemctl daemon-reloadroot@s0:~# df -h | grep nfs
192.168.0.2:/mnt/nfs 15G 128K 14G 1% /nfsNOTE: Make sure all up there was execute on whole node.
Master Node #
Alright lets move forward, right now we will configure master node. I consider to make s0 become a master node.
I will login into using ssh.
ssh root@s0root@s0:~# uname -a
Linux s0 6.6.95-ophub #1 SMP Sat Jun 28 15:05:42 UTC 2025 aarch64 GNU/LinuxAfter logged on, we need to install slurm workload manager packages.
apt install slurm-wlm dbus libpmix-dev libpmix-bin -yThen we need to make configuring in /etc/slurm directory.
Debian Bookworm <= #
cd /etc/slurm
cp /usr/share/doc/slurm-client/examples/slurm.conf.simple.gz .
gzip -d slurm.conf.simple.gz
mv slurm.conf.simple slurm.confDebian Trixie >= #
After do some test and analysis, I facing some error on trixie by this posted. *BUG: It start a duplicated network socket so port is clash into each other, and missing old
cons_resmodule.so.
Because that I decide back to bookworm version, It just test on this env Set-Top-Box (ARM) device.
cd /etc/slurm
cp /usr/share/doc/slurm-client/examples/slurm.conf.simple ./slurm.confSet the cluster name #
Modify /etc/slurm/slurm.conf and change your config, like below.
Change your cluster name.
ClusterName=Zephyr # Line 33Set the control machine info. #
change into SlurmctldHost=hostname(IP), this is master node placement.
SlurmctldHost=s0(192.168.1.2) # Line 48Add your whole nodes addr #
We need to introduce whole nodes into master node. Even the master itself.
NodeName=s0 NodeAddr=192.168.1.2 CPUs=4 State=UNKNOWN # Line 414
NodeName=s1 NodeAddr=192.168.1.3 CPUs=4 State=UNKNOWN # Line 414
NodeName=s2 NodeAddr=192.168.1.4 CPUs=4 State=UNKNOWN # Line 414Create a partition #
This is runtime of slurm to make it whole node connected into each other, about Nodes format you can use Nodes=prefix[0-<X>] or Nodes=s[0-2] or Nodes=[s0,s1,s2].
PartitionName=Zephyr Nodes=s[0-2] Default=YES MaxTime=INFINITE State=UP # Line 430Create new cgroup and allow device list #
cgroup.conf
# Use cgroup v2
CgroupPlugin=cgroup/v2

# Memory enforcement
ConstrainRAMSpace=yes
MaxRAMPercent=90
MinRAMSpace=32

# CPU isolation
ConstrainCores=yes

# Swap & devices (not enforced on cgroup v2)
ConstrainSwapSpace=no
ConstrainDevices=nocgroup_allowed_devices_file.conf
/dev/null
/dev/urandom
/dev/zero
/dev/sda*
/dev/cpu/*/*
/dev/pts/*
/nfs*Copy master config into NFS #
cp /etc/munge/munge.key /nfs/
cp /etc/slurm/slurm.conf /nfs/
cp /etc/slurm/cgroup* /nfs/Client Nodes #
We need to produce this step on whole client nodes.
We need to install packages for client nodes.
apt install slurmd slurm-client dbus libpmix-dev libpmix-bin -yCopy hostname #
We need to copy the whole hostname, which make slurm able to communicate easily. Copy into your whole nodes hostname, like below.
/etc/hosts
192.168.1.4 	s2
192.168.1.3 	s1
192.168.1.2 s0Copy Master config to Client node #
This command will copying a master config (s0), that was copy on NFS previosly into client configuration.
This is important because slurm are really dependence on “same” configuration.
cp /nfs/munge.key /etc/munge/munge.key
cp /nfs/slurm.conf /etc/slurm/slurm.conf
cp /nfs/cgroup* /etc/slurm/Master and Client #
Create Log for Slurm and Munge #
For Dietpi OS user need to configure default log2ram setting.
/var/log/are mount into tmpfs or RAM, there for its always errased when you reboot. Slurm and Munge will not happy it.
mkdir /var/log/slurm/
mkdir /var/log/munge/
chown -R slurm:slurm /var/log/slurm/
chown -R munge:munge /var/log/munge/Restart or re-enable whole services on each machine using systemctl.
systemctl enable --now dbus
systemctl enable --now munge
systemctl enable --now slurmd
systemctl status dbus
systemctl status munge
systemctl status slurmdTesting our Slurm HPC #
Passthrough ssh output (munge token) then decrypt using unmunge
NOTE: Munge are really depends on timedate, that why you need to synchronizing whole node in same timedate. Because munge key component to decrypt is using a simultaneous synchronized time.
root@s0:~# ssh root@s1 munge -n | unmunge
root@s1's password:
STATUS:          Success (0)
ENCODE_HOST:     s1 (192.168.1.3)
ENCODE_TIME:     2026-01-16 21:47:03 +0700 (1768574823)
DECODE_TIME:     2026-01-16 21:47:03 +0700 (1768574823)
TTL:             300
CIPHER:          aes128 (4)
MAC:             sha256 (5)
ZIP:             none (0)
UID:             root (0)
GID:             root (0)
LENGTH: 0If you facing invalid credential using munge? lets try to reboot whole node instead and try again.
root@s0:~# for NODES in {0..2};do ssh root@s$NODES munge -n | unmunge | grep STAT;done
root@s0's password:
STATUS:          Success (0)
root@s1's password:
STATUS:          Success (0)
root@s2's password:
STATUS: Success (0)Test using srun command.
root@s2:~# srun -N3 -l hostname
2: s2
0: s0
1: s1root@s0:~# srun -N3 -l uname -a
0: Linux s0 6.6.95-ophub #1 SMP Sat Jun 28 15:05:42 UTC 2025 aarch64 GNU/Linux
2: Linux s2 6.6.75-legacy-sunxi64 #1 SMP Sat Feb 1 17:37:57 UTC 2025 aarch64 GNU/Linux
1: Linux s1 6.6.95-ophub #1 SMP Sat Jun 28 15:05:42 UTC 2025 aarch64 GNU/LinuxThis is works!!!
Vibes in debug #
If you encounter any error, try to debug using journalctl or if specific issue relate into slurm try this instead.
/usr/sbin/slurmd -DvvvMake sure these configuration are equal across whole nodes. This bash oneliner will show hash value for each configuration, if the master node with the client aren’t equal, make sure redo the previos step.
root@s0:~#  md5sum `find /etc/slurm/ | grep .conf$ | sort`
feec0ae6f17beef093145826e48efa36  /etc/slurm/cgroup_allowed_devices_file.conf
87a7090ab20e55e101f59dfa2239277e  /etc/slurm/cgroup.conf
09066bb8111b0b80647d6c36994039b2  /etc/slurm/plugstack.conf
f1b1d4017a8dc63b8c563934ebb26d3f /etc/slurm/slurm.confConclusion #
After all, we’ve done installing slurm on unconventional machine (Set-Top-Box). These could be an alternative from a expensive “pi” out there. But with Notes, we should take responsibility itself, because there is no guarantee about what you’ve done into this one.
By here, there will be so many probability you can do on these, just find it.